Follow Me On Social Media!
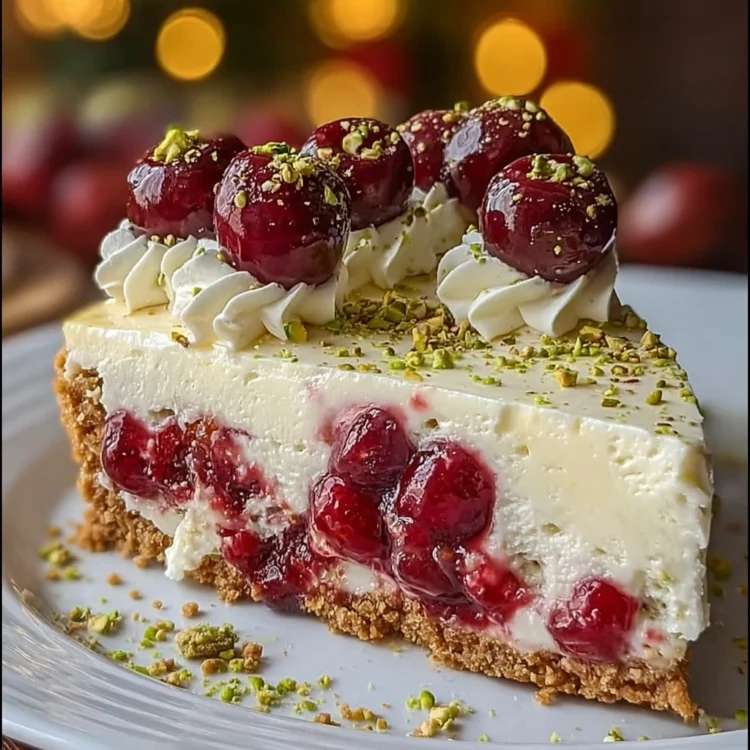
Cherry Pistachio Cheesecake Delight
This is the kind of cheesecake that makes a regular day feel like a celebration. You get that classic, creamy cheesecake base—rich but tangy—then a glossy cherry topping that tastes bright and jammy in the best way. And just when you think it can’t get better, the pistachios come in with that buttery crunch and a hint of “bakery dessert” energy.
I love making this when I want something that feels special but still comforting—holiday dinners, birthdays, or a quiet weekend when you want the fridge to hold a sweet surprise. The kitchen smells like vanilla and warm graham crackers while it bakes, and once it’s chilled, every slice is smooth, cool, and dreamy. It’s a dessert you linger over.
Ingredients
For the crust
1 ½ cups graham cracker crumbs
3 tablespoons granulated sugar
6 tablespoons unsalted butter, melted
For the cheesecake filling
16 ounces (450 g) cream cheese, softened
¾ cup granulated sugar
2 large eggs, room temperature
1 teaspoon vanilla extract
½ cup sour cream
¼ cup heavy cream
For the cherry topping
2 cups pitted cherries (fresh or frozen)
½ cup granulated sugar
1 tablespoon lemon juice
1 tablespoon cornstarch + 2 tablespoons water
For garnish
Whipped cream
¼ cup finely chopped pistachios
Instructions
Warm up the oven. Preheat to 325°F (165°C). Grease your springform pan lightly, just to be safe.
Make the crust. Stir together the graham crumbs, sugar, and melted butter. It should feel like damp sand and smell like buttery cookies.
Press and bake. Press the mixture firmly into the bottom of the springform pan. Bake for 8 minutes, then set it aside to cool.
Mix the filling. Beat the cream cheese and sugar until smooth and creamy. Take a moment here—getting it really smooth makes the final texture extra silky.
Add eggs gently. Mix in the eggs one at a time, just until combined. (Cheesecake likes a soft touch.)
Finish the batter. Blend in the vanilla, sour cream, and heavy cream until the batter looks glossy and luxurious.
Bake the cheesecake. Pour the filling over the cooled crust and smooth the top. Bake for 45–50 minutes, until the edges look set and the center still has a slight jiggle.
Cool slowly. Turn off the oven, crack the door, and let it sit for 1 hour. This gentle cool-down helps avoid cracks.
Chill. Refrigerate for at least 4 hours (overnight is even better if you can swing it).
Make the cherry topping. In a saucepan, combine cherries, sugar, and lemon juice over medium heat. Stir as it warms—your kitchen will start smelling like cherry pie filling.
Thicken it up. Mix cornstarch with water, then stir it into the cherries. Simmer until thick and glossy, like a quick homemade cherry sauce.
Cool completely. Let the topping cool fully before it goes anywhere near the cheesecake.
Assemble. Spoon the cherry topping over the chilled cheesecake and spread it gently to the edges.
Garnish. Pipe or dollop whipped cream around the border, then sprinkle pistachios over the top for a pop of color and crunch.
Slice and serve. Cut into slices and serve chilled—this is when the texture is at its best.
Presentation
Clean slices hack: Dip your knife in hot water and wipe it dry between cuts. It makes those layers look crisp and neat.
Make it extra pretty: Pipe whipped cream in little clouds around the edge, then let a few cherries peek through like jewels.
Pistachio placement: Sprinkle some right before serving so they stay crisp and don’t soften into the topping.
Optional “fancy” touch: A tiny pinch of flaky sea salt on top makes the cherries taste even brighter.
Conclusion
If you love the combo of creamy + fruity + crunchy, this cheesecake is going to win you over fast. The filling is smooth and tangy, the cherry topping is bold and glossy, and the pistachios make every bite feel a little more special. It’s the kind of dessert people ask about after the first slice… and quietly sneak seconds of.
If you’ve got a few hours for chilling time, I’d put this on your “make soon” list. It’s so worth it. 💛
Prep Time: 25 minutes | Bake Time: 50 minutes | Total Time: ~5 hours
Servings: 10 slices | Calories: ~420 kcal per slice